WooCommerce Module Guide
What is WooCommerce?
WooCommerce is an ecommerce plugin for WordPress. It makes creating and managing an online store simple, with reasonable levels of flexibility and several vital features such as inventory and tax management, secure payments, and shipping integration.
Source: Nexcess
WooCommerce Module for StoreMate
This is a separate module for interconnecting your e-commerce website and StoreMate inventory management software. You can connect product details including stock level, and website orders also sync with StoreMate.
Options in the WooCommerce Module
- Product details sync from StoreMate POS to WooCommerce website:
- Product Name
- Price
- Quantity
- Category
- Weight
- Images
- Description
- Order details sync from WooCommerce website to StoreMate POS:
- Order date
- Order Number
- Customer details
- Ordered product, qty, and price
- Order discounts and coupons
- Order Tax details
- Order credit card payment
- Order status
- Payment status
- Other Options:
- Auto and manual sync option of orders
- Order sync log
- WooCommerce order identification method
- WooCommerce order filtering option
How to Work
Enable Module
- Step 01: Update your subscription for the WooCommerce Module. (Contact Storemate Support)
- Step 02: Generate your WooCommerce API key from your WooCommerce plugin.
Go to WooCommerce -> Settings -> Advanced -> REST API. Enter a description, select User & Provide Read/Write Permission.
- Step 03: Update the keys on the StoreMate WooCommerce module. Go to Home -> WooCommerce -> API Settings and update the keys.
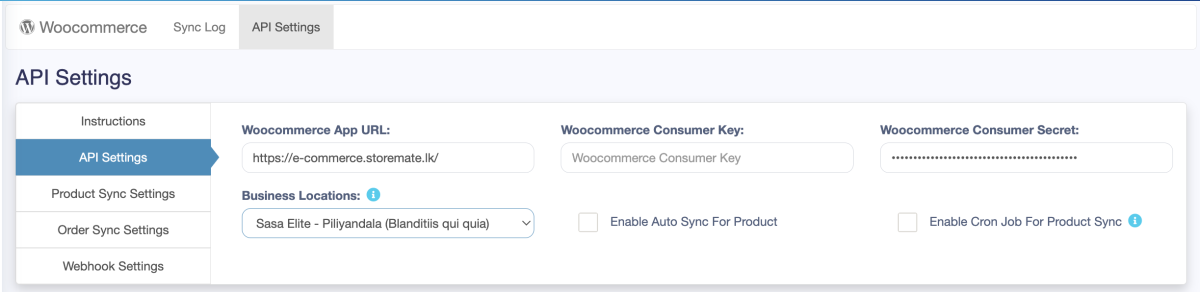
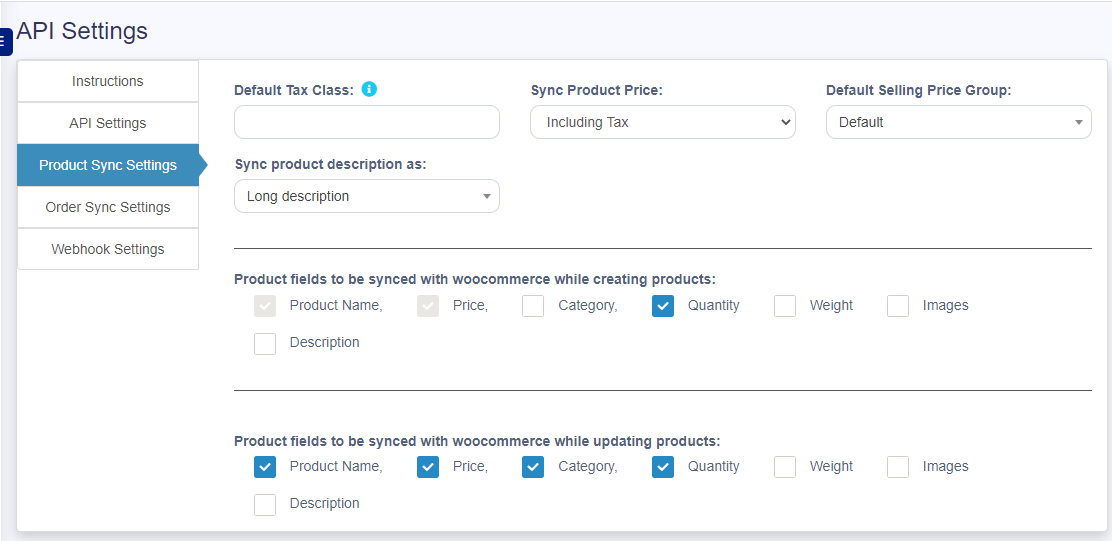
- Step 04: Update product sync settings.
Navigate to Home -> WooCommerce -> API Settings -> Product Sync Settings. Here, you can enable the product details you want to sync with the WooCommerce website.
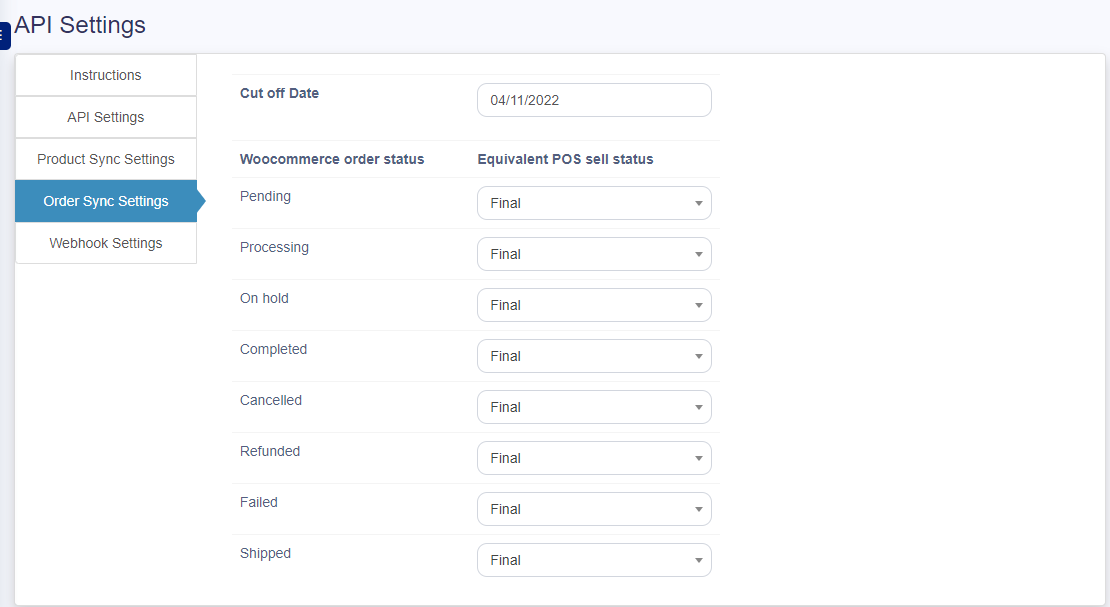
- Step 05: Update order sync details.
Go to Home -> WooCommerce -> API Settings -> Order Sync Settings.
Product SYNC with a WooCommerce Website
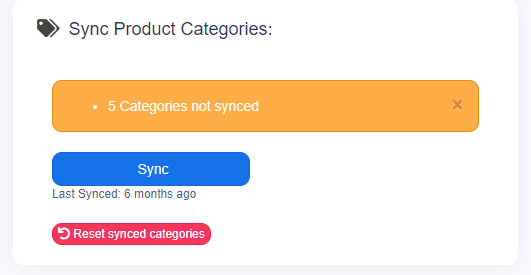
Category Sync
Go to Home -> WooCommerce Module -> WooCommerce -> Category Sync to sync product categories between StoreMate POS and WooCommerce.
Product Sync
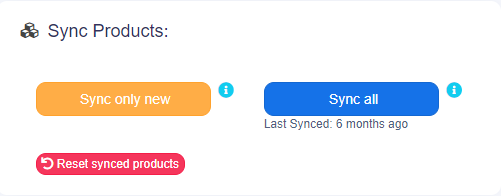
Go to Home -> WooCommerce Module -> WooCommerce -> Update or Sync All to update product details. Use ‘Update’ to sync changes or ‘Sync All’ to sync new and existing products.
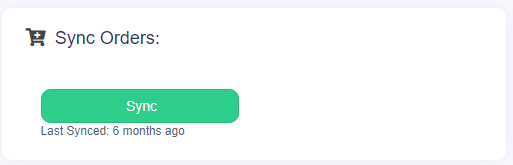
Order SYNC with StoreMate POS
Navigate to Home -> WooCommerce Module -> WooCommerce -> Order Sync to sync orders from WooCommerce to StoreMate POS.
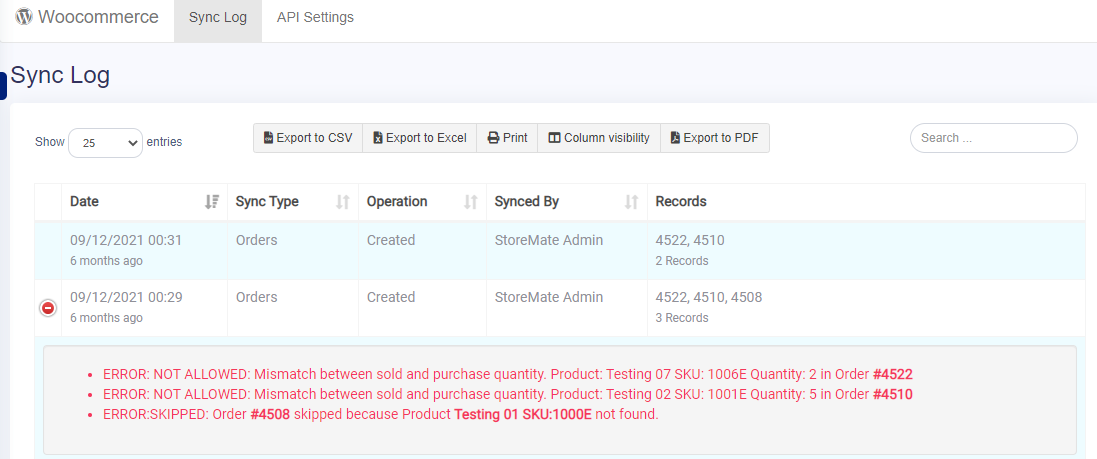
Order Sync Log
If there is any issue with the sync process, you can check the Order Sync Log.
How to Enable Product Auto Sync
StoreMate now offers a convenient feature that allows you to automatically sync your products and stock with WooCommerce. Follow the guide below to enable the “Auto Sync For Product” option.
- Step 1: Go to WooCommerce Sync > Products.
- Step 2: You will see a toggle button labeled Enable Product Auto Sync.
- Step 3: Toggle the switch on to enable the feature.
Once enabled, any changes you make to your products in StoreMate will automatically reflect on your WooCommerce store without manual sync.


