Repair Module – Detailed Guide
The StoreMate repair module helps you manage repair jobs in an advanced manner. Mobile phone repair, electrical item repair, and computer repair shops can manage their entire repair process with this module.
Core Features of the Repair Module
- Manage repair jobs with customer details.
- Record all item (product) details with a single view.
- Serial number tracking.
- Customizable repair status based on your business.
- SMS and email notifications for repair jobs.
- Spare part monitoring system based on the repair job.
- Invoice management linked to the repair job.
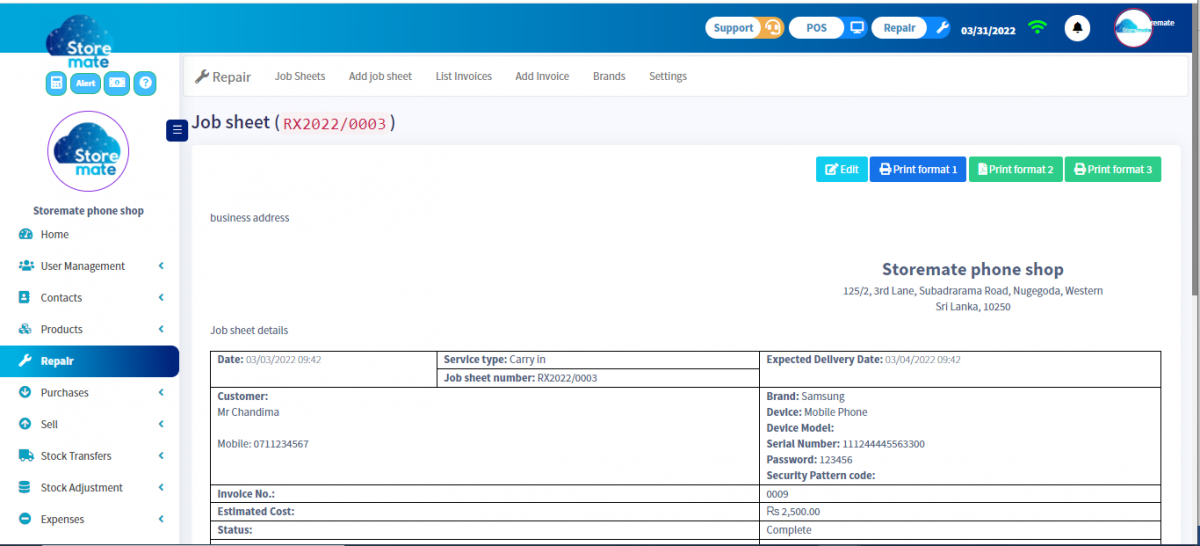
Job Sheets
Customers can create a worksheet with all the details to repair the items they bring in.
Add Job Sheet
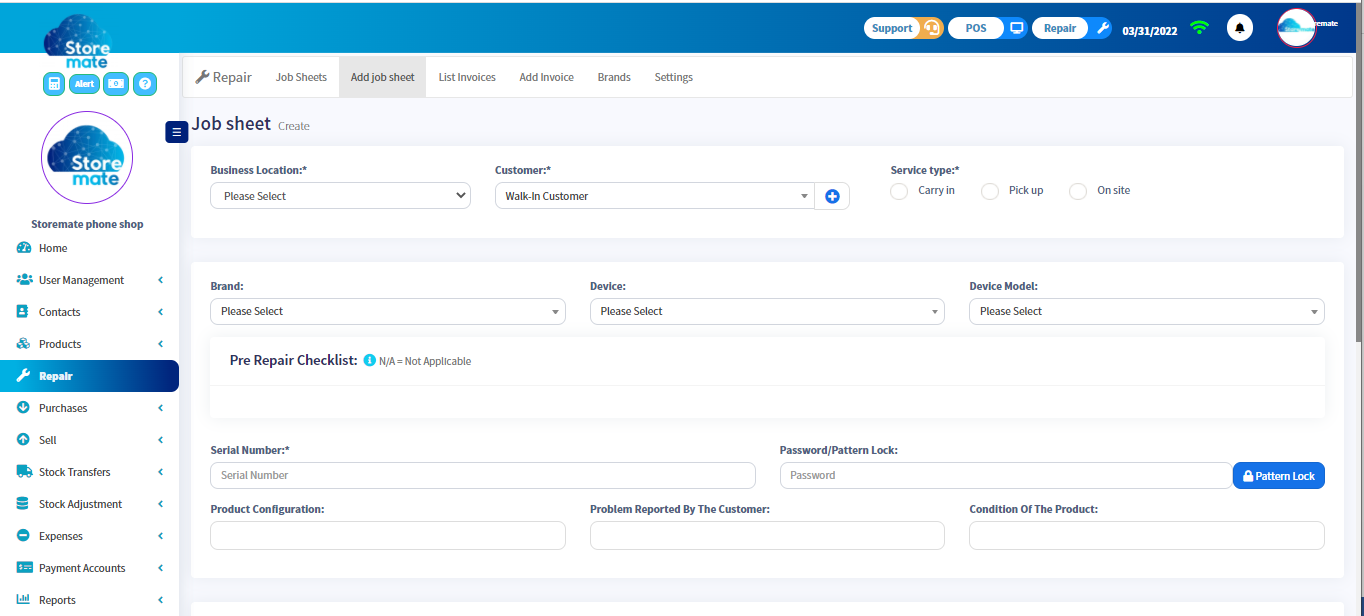
- Click the “Job Sheet”.
- Click the “+Add” button to create a new Job sheet.
- Enter the job details:
- Business Location: Select your branch/location.
- Customer: Choose your customer from the list or add a new one.
- Service Type: Select the service type.
- Brand: Select the product brand (make sure it’s added under repair settings).
- Device & Device Module: Choose the device being repaired.
- Pre-Repair Checklist: Customize via repair settings.
- Serial Number: Enter the product’s serial number.
- Password/Pattern Lock: Enter device password or pattern.
- Product Configuration: Customize product configuration using repair settings.
- Problem Reported by the Customer: Add customer feedback.
Add Invoice (Method 01)
After completing the job sheet, you can invoice your customer using the repair POS screen. Ensure job service costs are added as a service product.
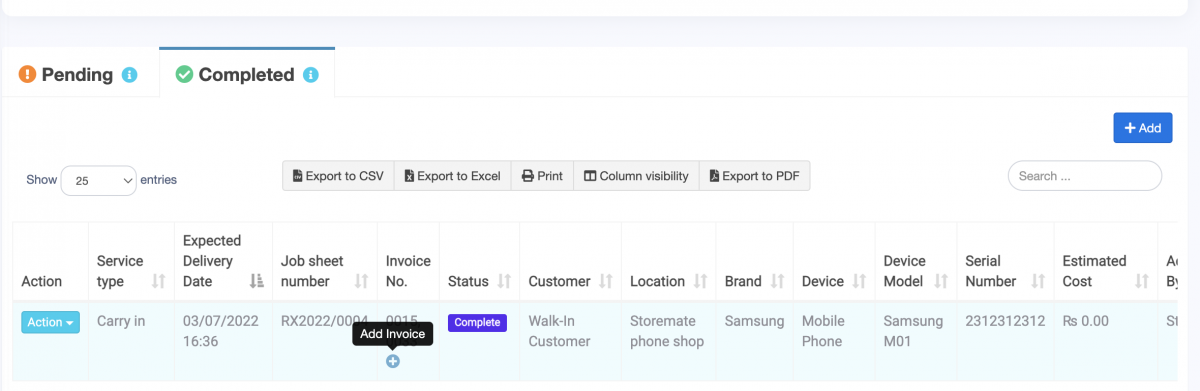
List Invoices
- View invoice details based on the job sheet.
- Pending indicates an incomplete job.
- Completed means the job is finished.

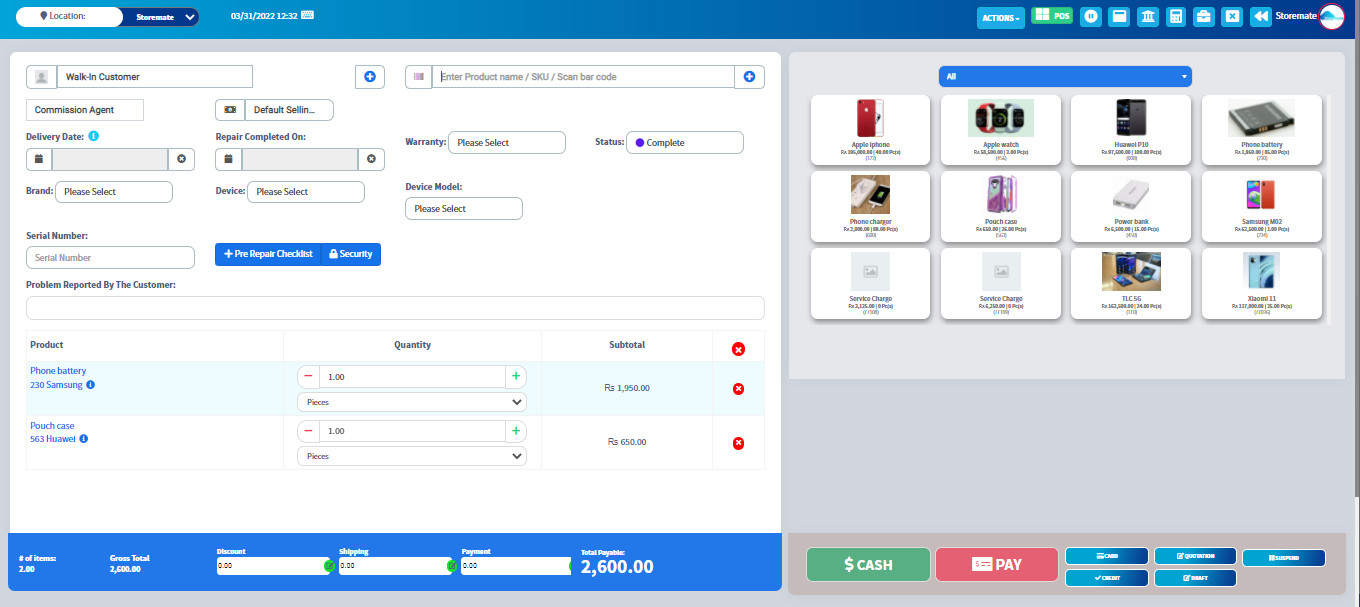
Add Invoice (Method 02)
- Create invoices and job sheets together.
- Add job details, accessories, and payment in one step.
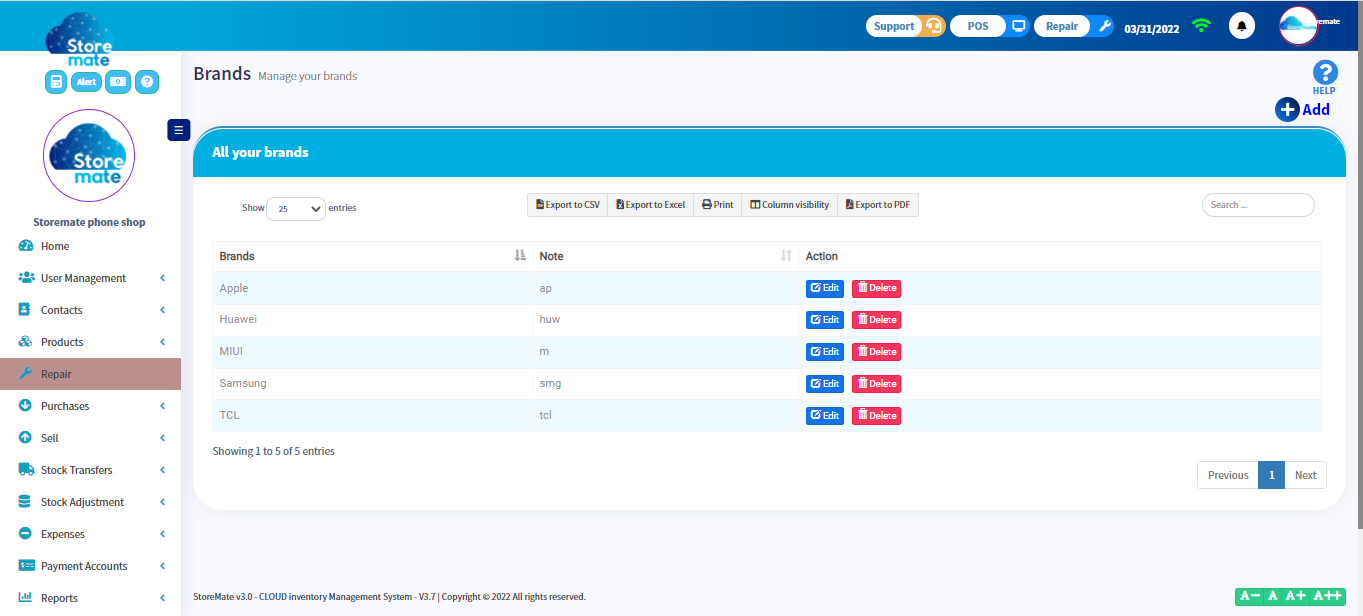
Brands
- Click “Brand” to add repair brands.
- Click “+Add” and create a New Brand with name and description.
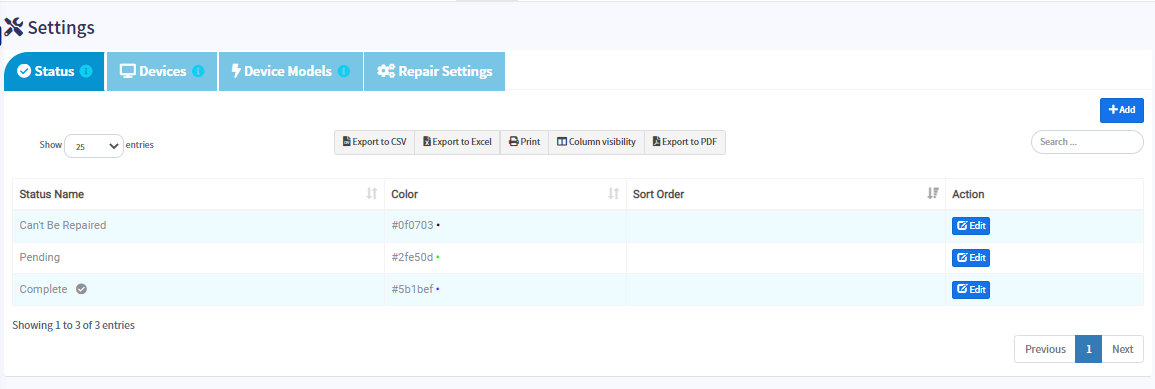
Settings
- Adjust status, devices, device models, and other repair settings.
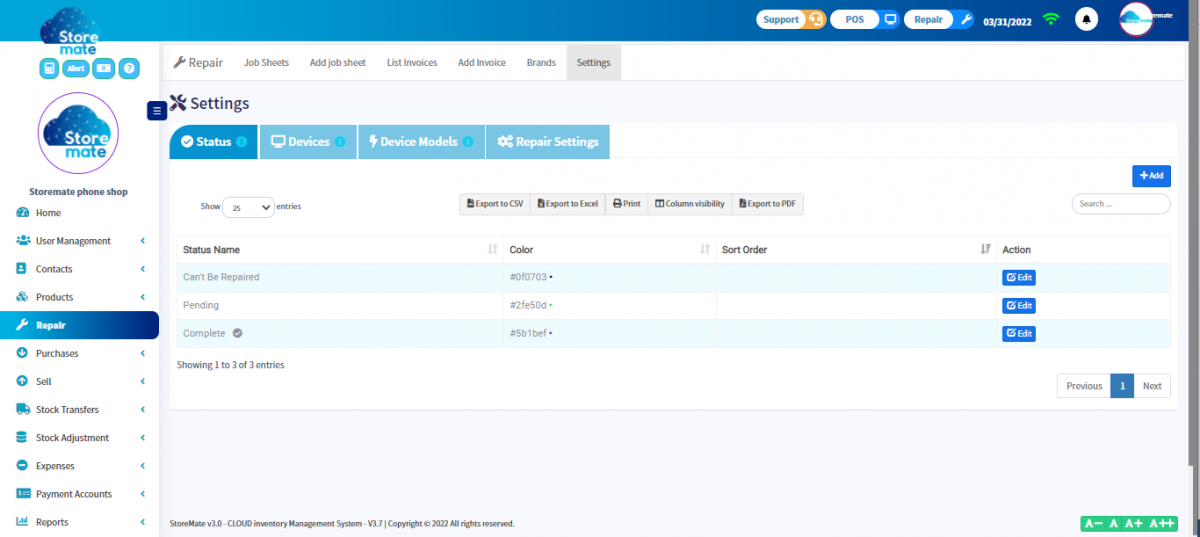
Status
- Create and manage custom statuses.
- Define status names, colors, and order display.
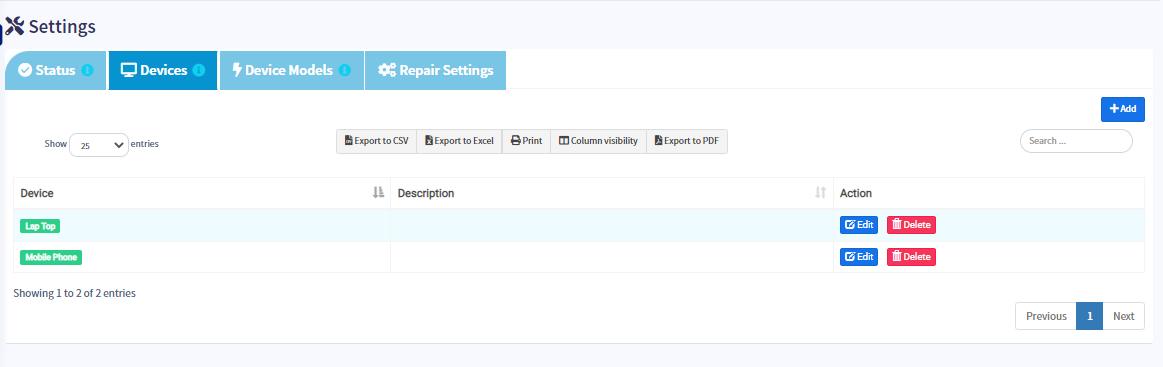
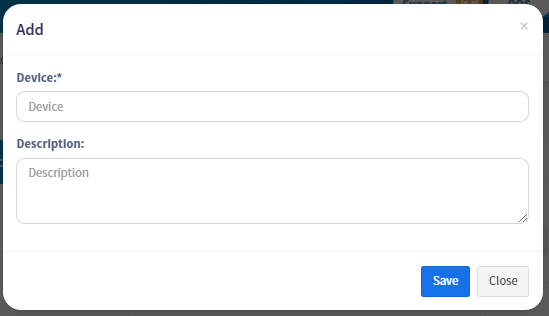
Devices
- Add device types through settings.
- Provide device details and descriptions.
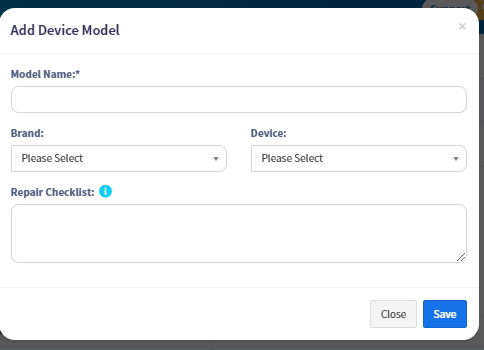
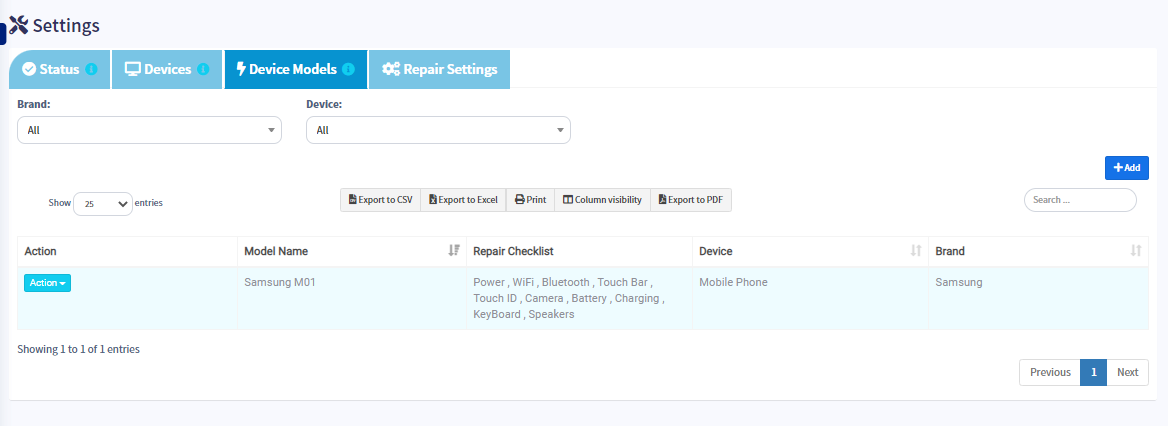
Device Models
- Add device models applicable to your business.
- Provide model names, brand, and device association.
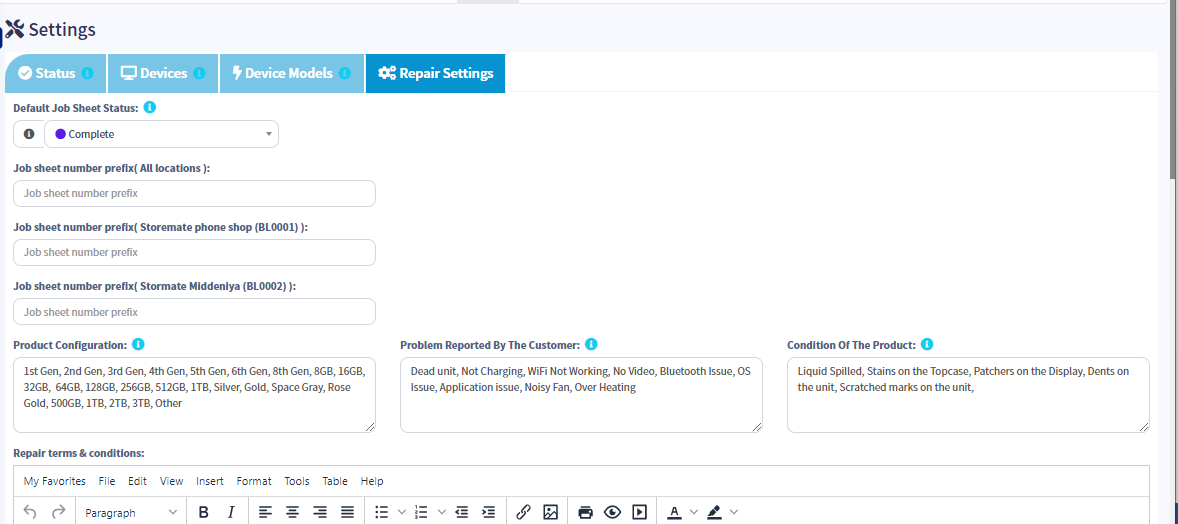
Repair Settings
- Customize job sheet contents before setup.
- Define default job sheet status, number prefixes, and conditions.
- Input terms, conditions, and other custom information.
For more information about using the StoreMate repair module, refer to the official documentation or contact our support team.


