We’re excited to announce the release of StoreMate OMS v1.0.13, packed with powerful new features and essential improvements designed to streamline your operations and enhance your control.
💡New Features
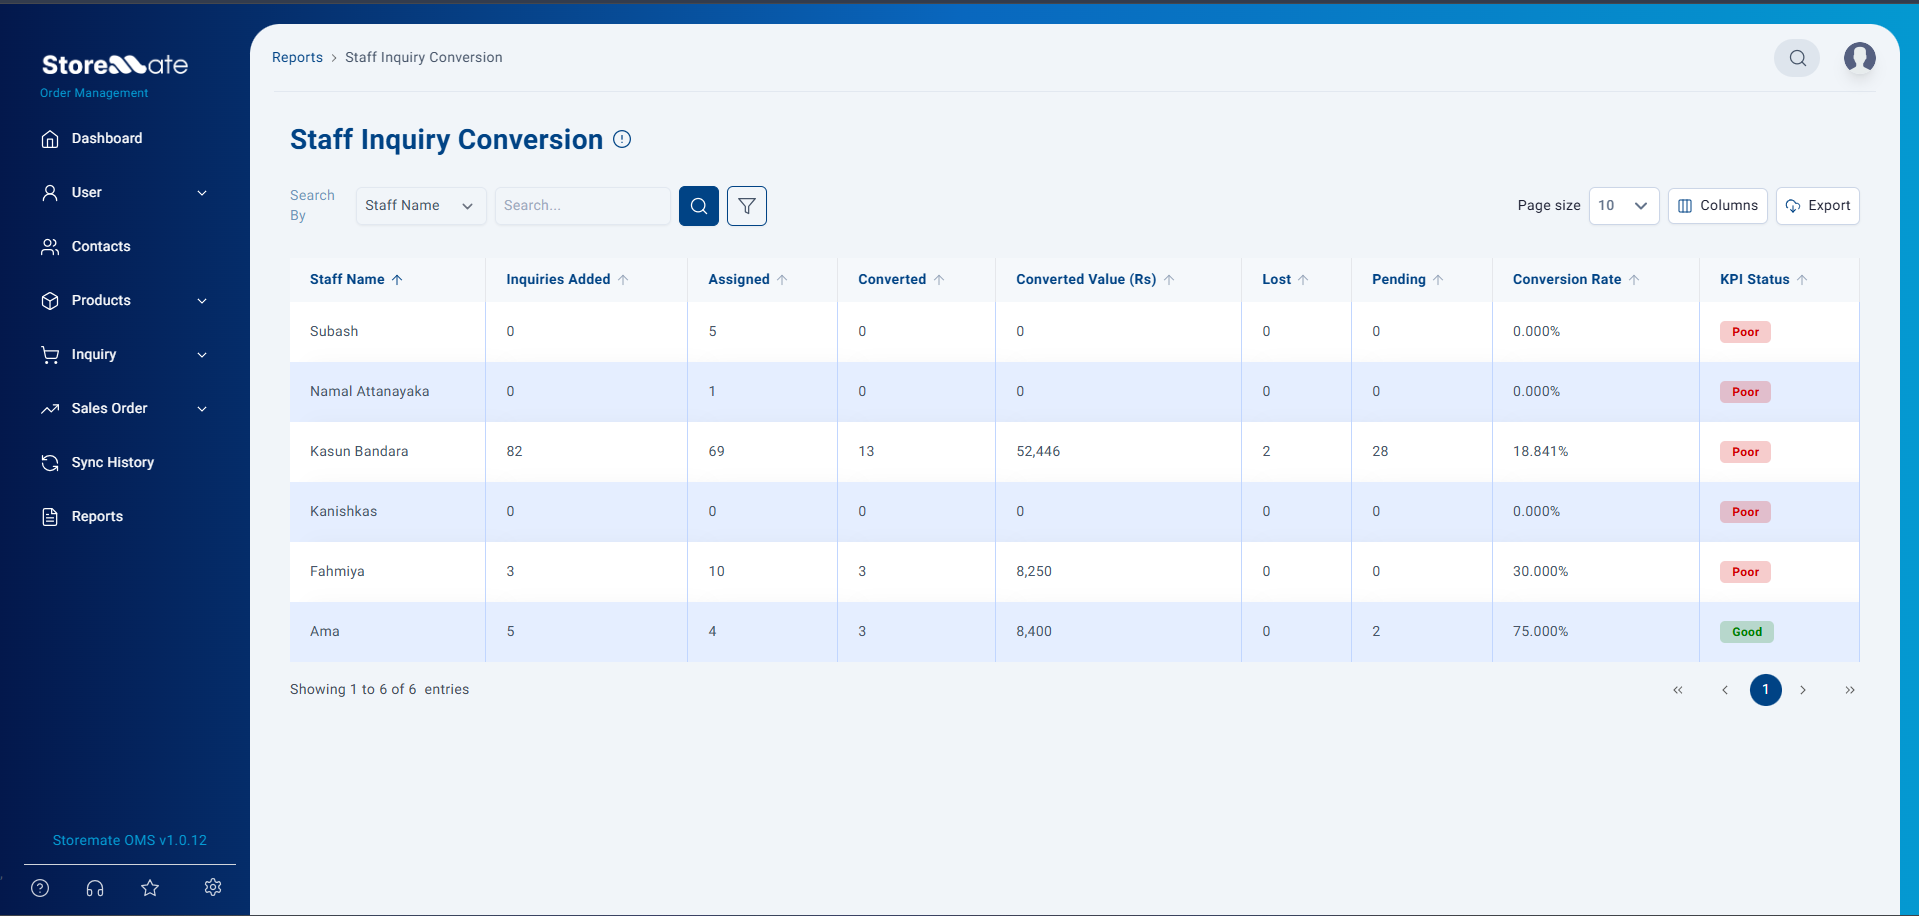
Employee Performance Report – Track Your Team’s Success
This new module provides comprehensive insights into your staff’s inquiry management and conversion efficiency. Identify top performers and areas for improvement with detailed metrics.
Key Capabilities:
- Performance Summary Table: View each staff member’s inquiries added, assigned, converted (count and value), lost, and pending.
- Conversion Rate KPI Settings: Define and track KPI levels (Poor, Average, Good) with customizable percentage ranges, allowing for time-based configuration to adapt to evolving business goals.
- Flexible Filtering: Filter reports by date range (based on converted date) and assignee name.
- Export Options: Easily export summary data to Excel or CSV and PDF.
How to Access:
- Navigate to the Report module.
- Select Staff Performance Report.
- Apply desired filters and view the performance summary.
🚀Improvements
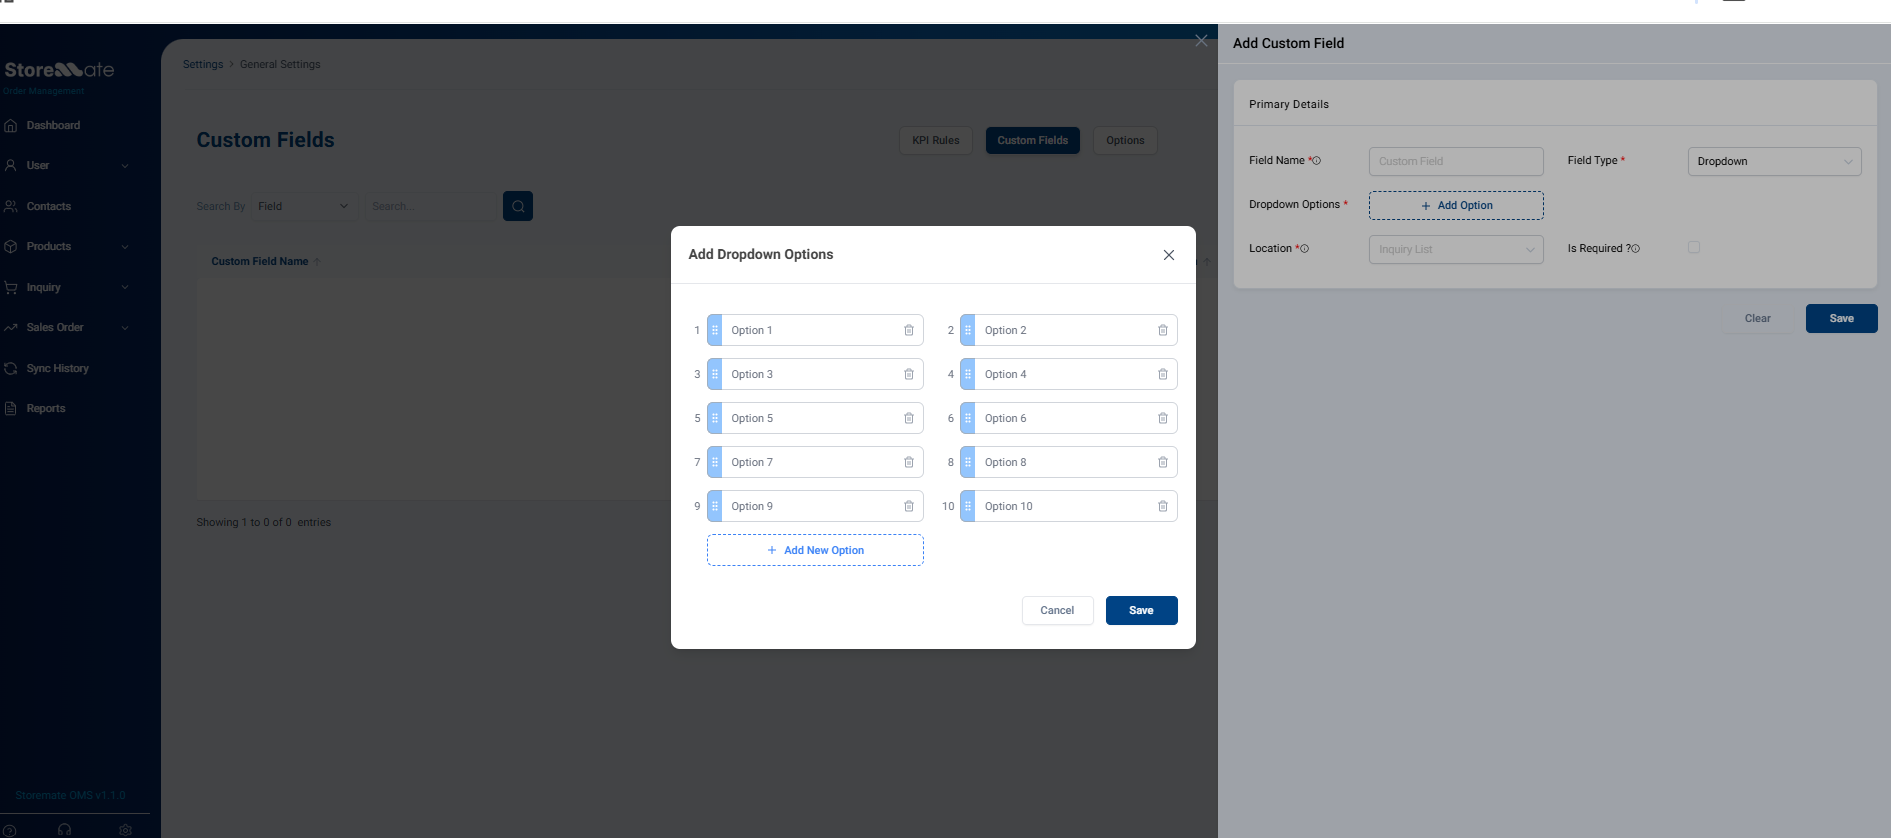
Custom Fields – (Parts 1)
This significant enhancement allows you to create custom fields across various modules, giving you the flexibility to capture data unique to your business processes without system-wide changes.
Key Capabilities:
- Flexible Field Locations: Add custom fields to Inquiry, User, Product, and Customer modules.
- Diverse Field Types: Choose from Dropdown.
- Configurable Settings: Define field names, set as required, and configure dropdown options.
- Seamless Integration: Custom fields are visible and usable in:
- Add/Edit forms for selected modules (e.g., Inquiry, User, Customer, Product).
- Sales Entry (linked to Inquiry custom fields).
- Data Table Views (as additional columns).
- Import templates (e.g., Inquiry import Excel template).
- Enhanced Data Management:
- Export Options: Custom fields are included in table exports.
- Column Visibility & Re-ordering: Manage how custom fields appear in list views.
How to Create & Use Custom Fields:
- Go to General Settings.
- Click on the Custom fields Tab
- Select Add New Field.
- Choose the Location(s) (e.g., Inquiry, User, Product, Customer).
- Define Field Name, Field Type, and other configurations (e.g., dropdown options).
- Once created, these fields will appear in the respective module’s Add/Edit forms and list views.
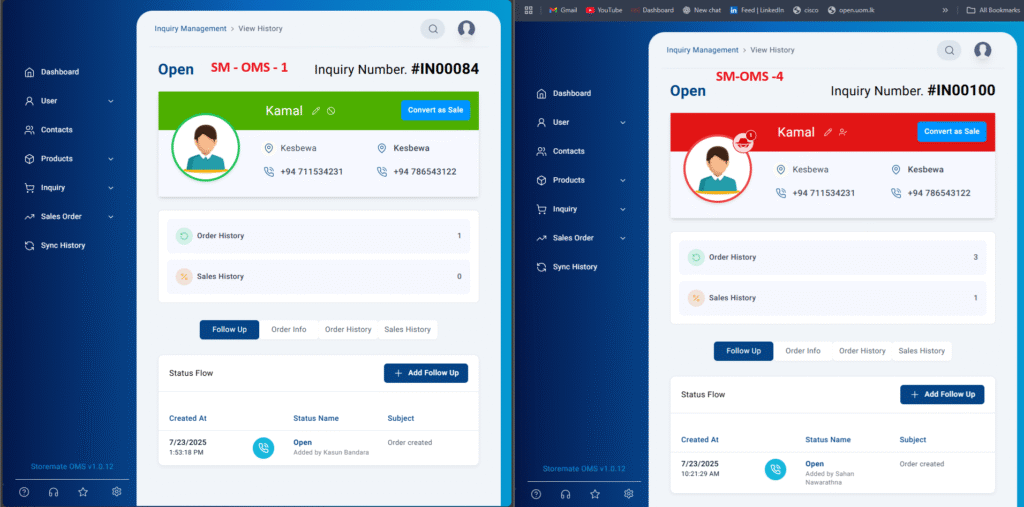
Customer Ban Option – Protect Your Business from Fake Customers
Safeguard your business by identifying and managing problematic customers with new private and public banning capabilities.
Key Capabilities
- Customer Ban Badge: A visible badge indicates how many other sellers have banned the same customer.
- Privacy & Security: Public bans only show phone/email and ban count, protecting full customer info and merchant identities.
Self-Business Registration – Automated Onboarding for New Merchants
The new self-registration module allows business owners to independently register their businesses on StoreMate OMS, simplifying the onboarding process and reducing administrative overhead.
Key Capabilities:
- Web-Based Registration Form: Accessible via a public URL, fully responsive for mobile and desktop.
- Guided Registration: A two-section form captures business & owner details, then login credentials.
Smart Auto-Suggestions & Validation:
- Business Username: Auto-suggested from business name (e.g., “Royal Textiles” -> “royal_textiles”).
- Login Email: Auto-filled from owner email, with real-time uniqueness checks.
- Password: Strong password validation (8–12 chars, uppercase, lowercase, number, symbol) with a “Generate Suggested Password” option.
- Seamless Login: Users are redirected to the login page with pre-filled credentials for immediate access to their new StoreMate OMS dashboard.
How to Register:
- Access the registration form at https://register.storemate.lk. `
- Fill in Business & Owner Details
- Click “Next”.
- Fill in Login Details (Section 2), using auto-suggestions or generating a password if desired.
- Click “Submit”.
- You will be redirected to a confirmation page and then to the login page with your new credentials pre-filled.


