Adding Product Guide
Video Guide
Detail Guide: Adding Product
Follow these steps to add a product to your system:
Step 1: Go to Products > Add Products
Step 2: Fill in Product Details
- Product Name: Name of the product.
- Brand: Brand of the product.
- Units: Measurement units (e.g., kg, piece).
- Category/Sub-category: Choose from the dropdown list.
- SKU: Add a unique SKU for identification or leave empty for auto-generation.
- Barcode Type: Choose a barcode type (C128 recommended).
- Not For Selling: Mark as “not-for-selling” to hide from POS or sales screen.
- Alert Quantity: Set a stock level to trigger an alert when stock reaches or falls below this level.
- Manage Stock: Enable stock management for the product (not required for services like Repairing, Web Development, etc.).
- Business Location: Select the business location(s) where the product can be sold.
- Applicable Tax: Add applicable tax for the product.

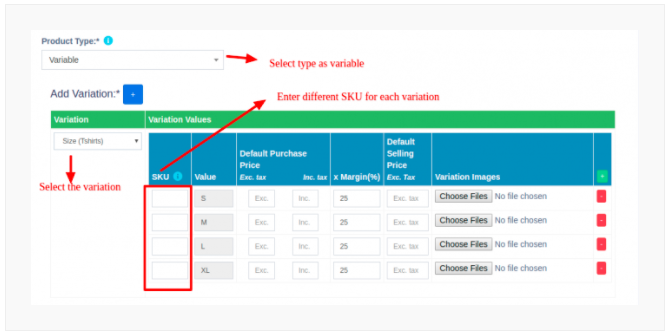
Step 3: Choose Product Type
- Single Product: For products with no variations. Enter the default price, profit margin percentage, and selling price.
- Variable Product: For products with variations like size or color. Create variation templates under Products > Variations.
- Combo or Bundle Product: For products that bundle multiple items together (e.g., Computer Set).

Step 4: Save the Product
Click “Save” after entering all the product details. You can also edit, copy, or export the product details to CSV, PDF, or Excel.
Adding Products with Multiple Variations:
- Solution 1: Create a combined variation with “Color-Size” (e.g., Red-Small, Red-Medium, etc.).
- Solution 2: Create separate products for each variation (e.g., Shirt-Red, Shirt-Green, etc.).
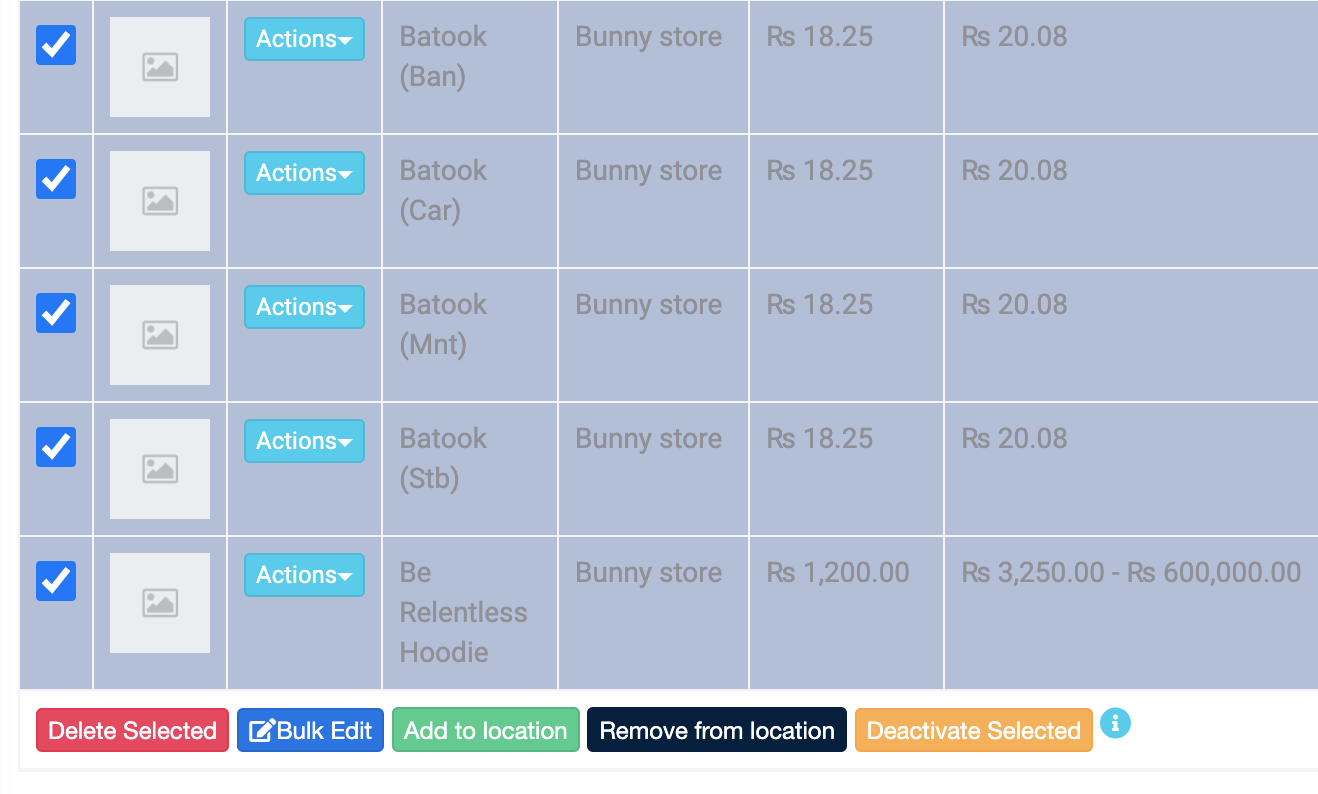
Step 5: Assign/Remove Locations for Multiple Products
Go to List Products and select products to assign or remove locations.

Step 6: Deactivate & Activate Product
Select all products and click the “Deactivate Selected” button to disable products.