Creating an Order
Step 1: Navigate to Add Order
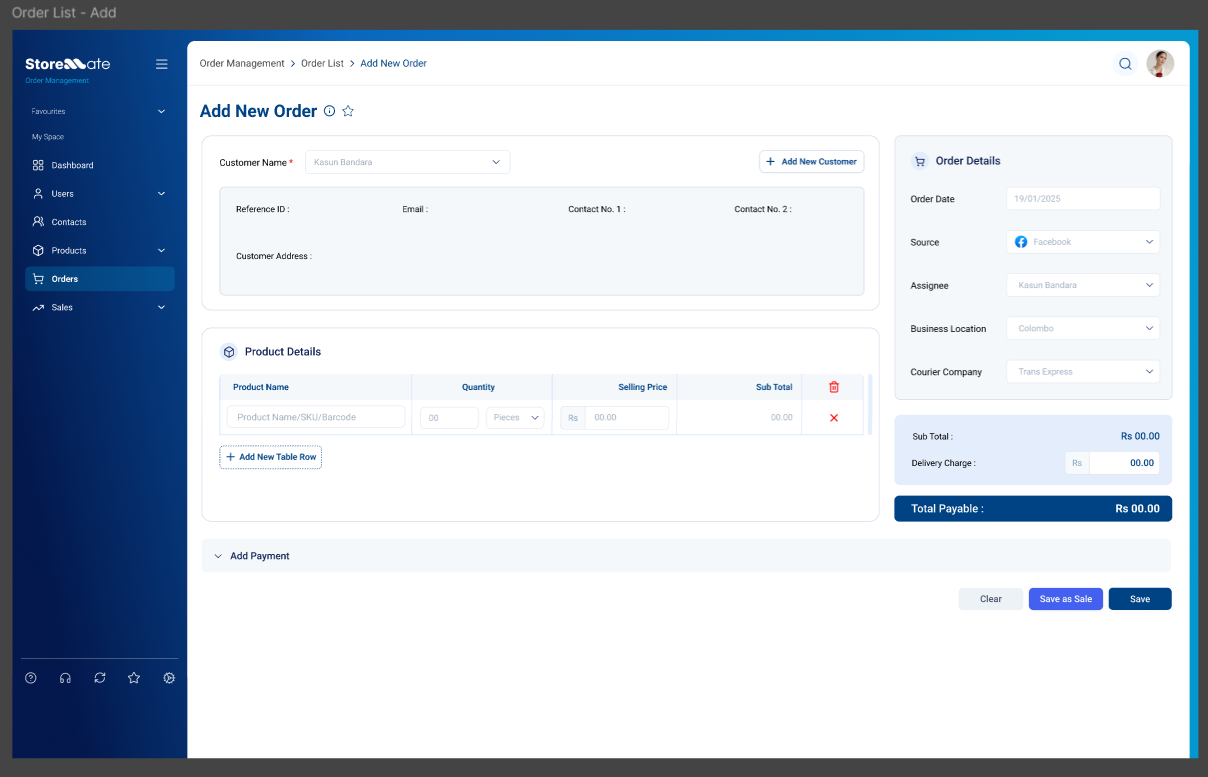
To create a new order, go to Enquiries > Add Order

Step 2: Fill in the Following Sections
- Customer Info: Select an existing customer or add a new one. If an existing customer is selected, their details will automatically be filled in.
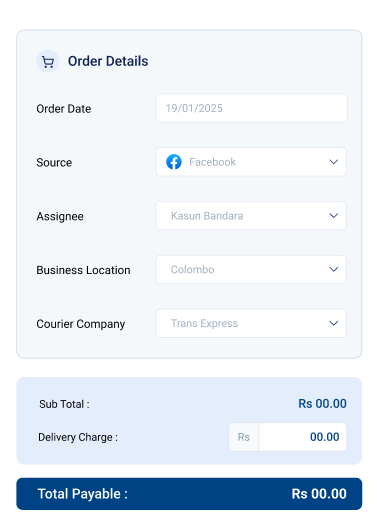
- Order Info: Fill in the source, assignee, courier, and other order-related details.
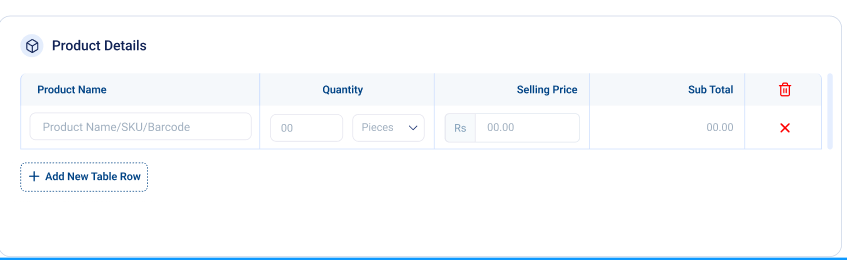
- Product List: Add multiple products via rows.
- Payment Info: (Optional) This section will show upon expanding.
Step 3: Save as Enquiry or Sale
You can either save the order as an enquiry for follow-up or save it directly as a sale:
- Save: Saves the order for follow-up.
- Save as Sale: Moves the order directly to sales with “Open” status.
Customer Information
You can either select an existing customer or add a new customer.
Select Existing Customer

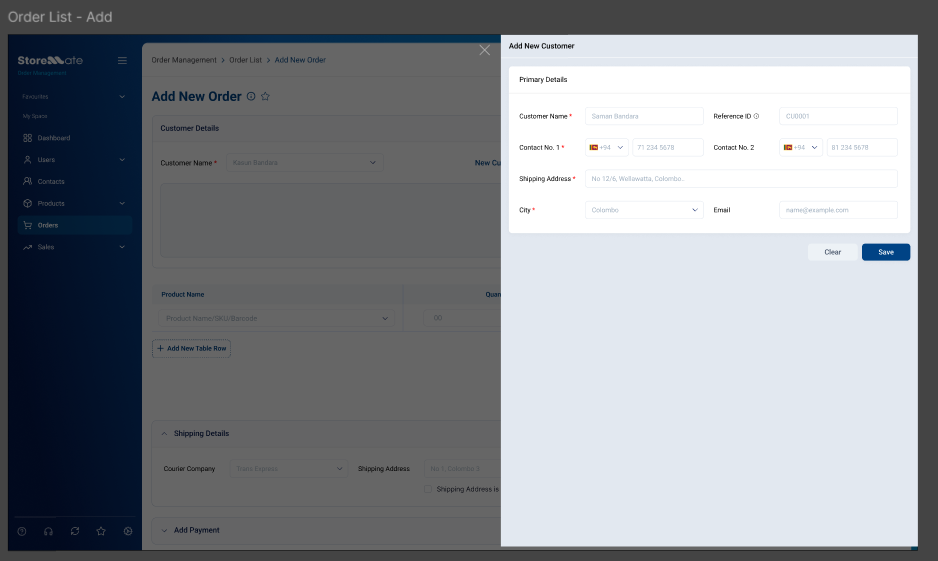
Add New Customer
A new customer can be added by clicking the “Add New Customer” button.
Order Information
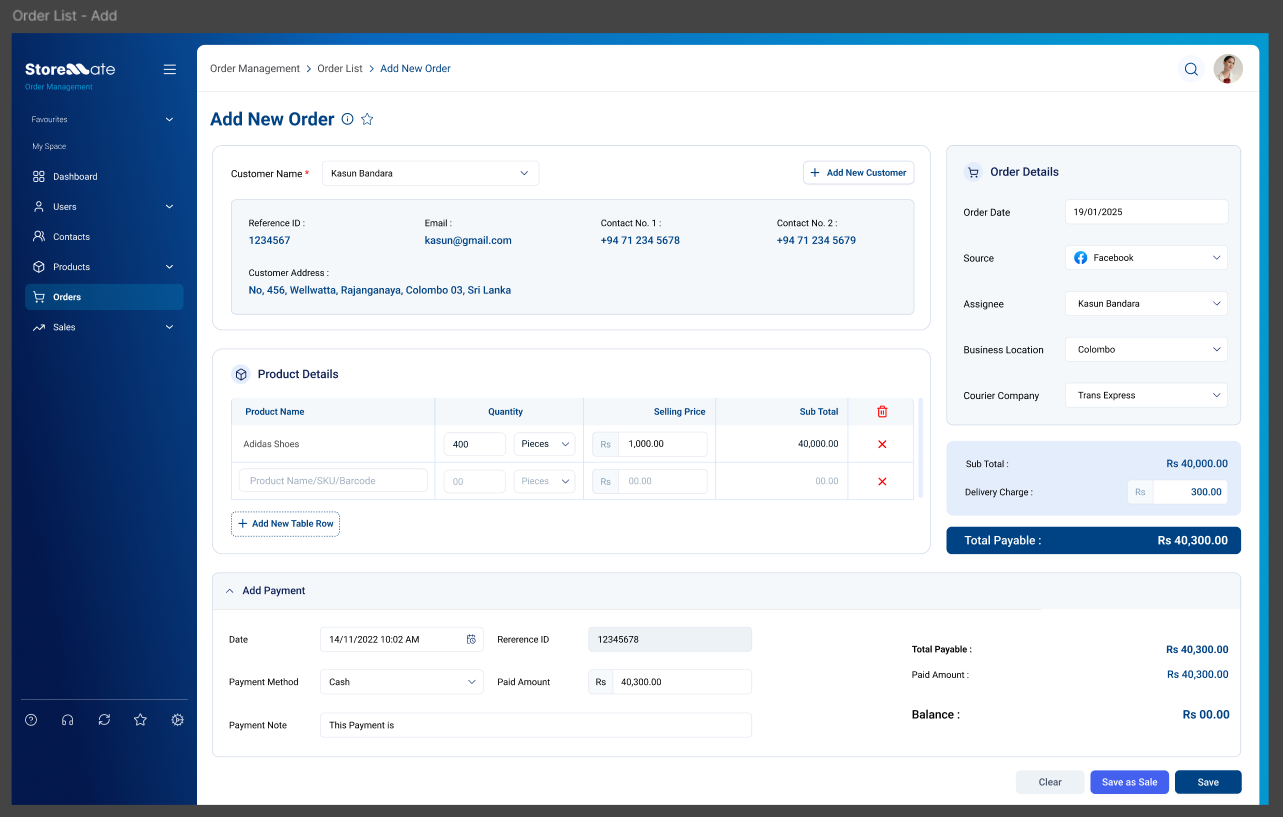
You can edit customer, product details, and payment information with multiple payment options.
- Date: Default pick is today’s date.
- Source: Select from a predefined list (e.g., Facebook, WhatsApp, TikTok, etc.).
- Assignee: The logged-in user is selected by default, but can be changed if needed.
- Business Location: Defaults to the selected business location if there’s only one.
- Courier Company: Defaults to the active courier company.
Product Information
Payment Information
This section is optional and will appear if expanded. You can add payment details such as payment method and amount.
All-in-One Screen
Expanded Payment Section
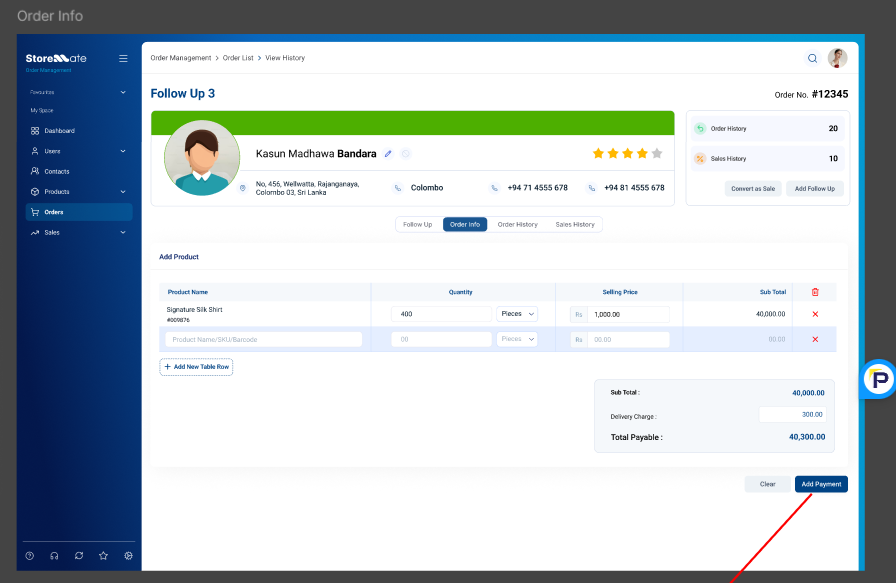
Add New Payment from Order Info

Process Flow
- The required fields in the customer, order, and product details sections must be filled in, while the payment section is optional.
- Products can be listed by clicking on “Add New Table Row.”
- If the payment section is not filled, the order total will be considered as the balance payment (COD).
- The order can be saved by clicking “Save,” or it can be finalized as a sale by clicking “Save as Sale.”
- If saved as a sale, it will appear in the sales list table, and the default packing and shipping status will be set to “Open.”
- The Assignee field should default to the logged-in user; if not, another assignee must be selected.


